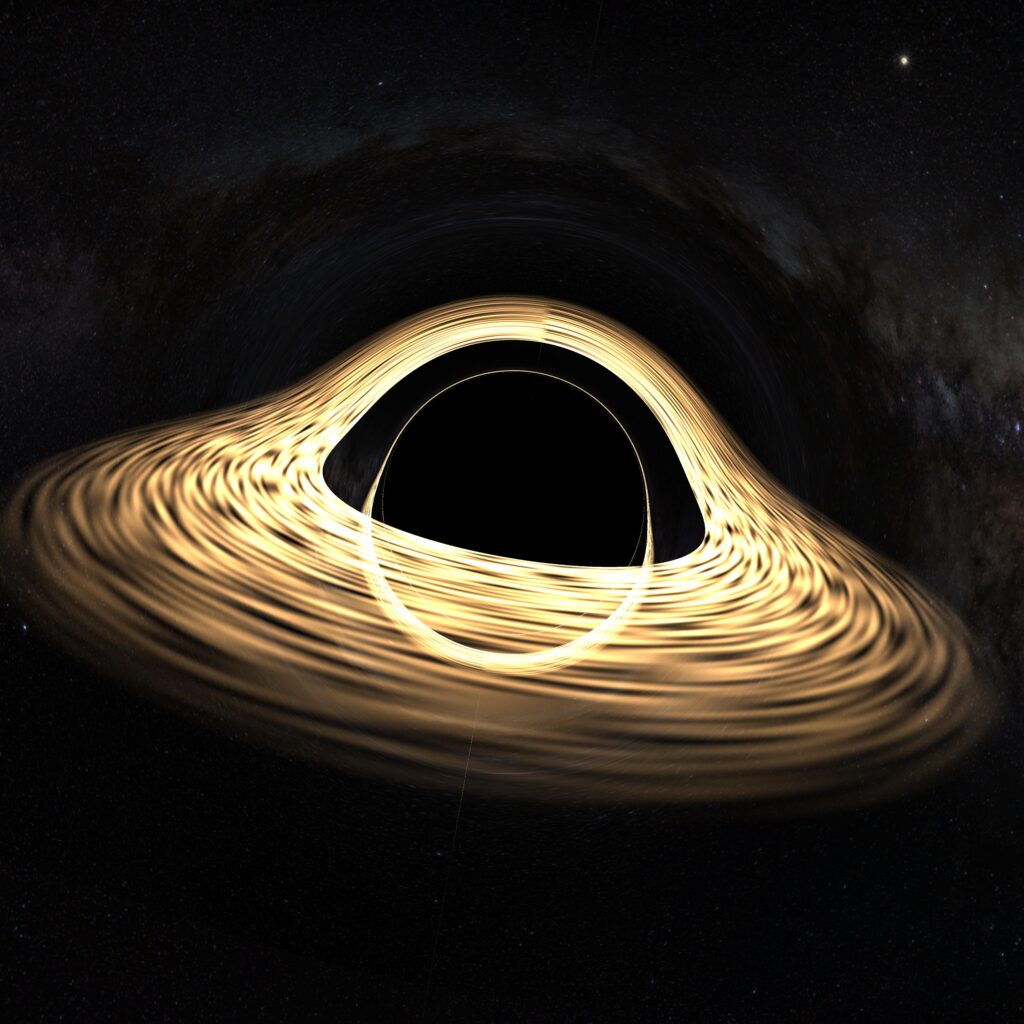
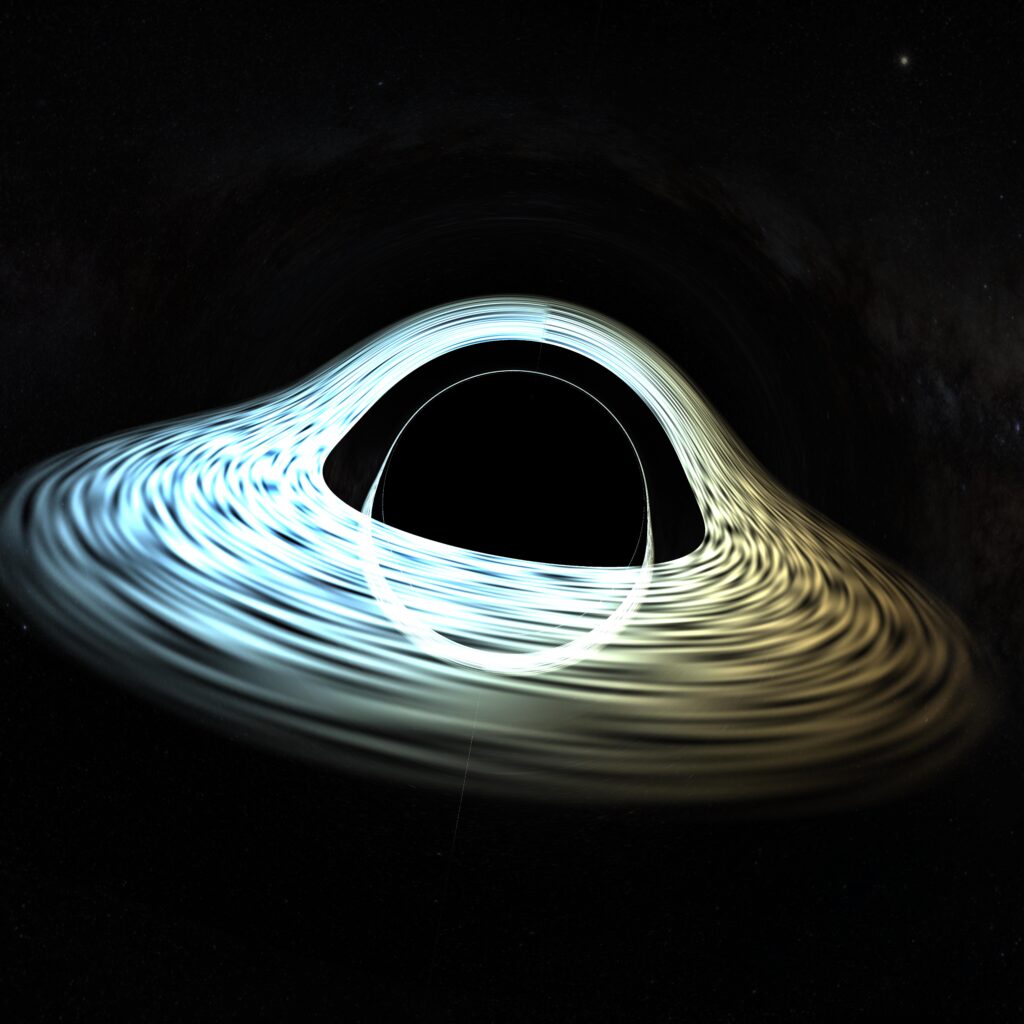
Okay I ended up making this write-up waaaaaay too long, so before I get into any of the jargon, let’s take a look at the finished product:
Wowie! What you’re looking at is (mostly) what it would look like to orbit around a supermassive black hole, rendered (almost) entirely through physical principles. Get a good look at it now, because I’m really proud of this one and I’m going to deep dive into all the steps, and it’ll be a bit before we get back to anything that looks nice.
Since this write-up got away from me a bit, I’ve split it into three mostly-independent parts:
Contents:
Part 1 – A Bit of Background Info
Part 2 – Building the Renderer
Part 3 – So What Exactly Am I Looking At?
References
Part 1 – A Bit of Background Info
So what is this project? It’s a general relativistic ray tracing renderer simulating a Schwarzchild black hole and its accretion disk, written in HLSL shader language and run in Unity with C#. There’s that jargon! Let’s break down each of these terms:
What is Relativity?
In short, relativity is the theory that describes the physics of things that are really big, really heavy or move really fast.
Way way back in the year 1905, a guy named Albert Einstein exploded onto the scene, publishing four revolutionary physics papers within the course of the year. Among them was a paper whose title translates to “On the Electrodynamics of Moving Bodies”, which introduced the theory now known as Special Relativity.
Special Relativity evolves from the simple idea that the laws of physics should behave the same, no matter what direction you’re moving, or how fast. Einstein observed that Maxwell’s Equations, which describe electromagnetism, don’t have any dependence on direction or velocity, and for this reason the speed of light, which was established theoretically by Maxwell, must be constant. This fact was also recently observed in the famed Michelson-Morley Experiment, which attempted to measure the motion of an assumed background medium of light but found none.
Starting from a constant speed of light, you can derive a bunch of weird but experimentally verified phenomenon. Most significantly, lengths of time and distances in space become distorted when observers move relative to one another. Lengths get shorter, time moves faster, events appear to occur in different orders to different observers, etc. It’s headache inducing but very interesting, and if you want to get more into it, the YouTube channel Minute Physics has a great intro series on it.
Special Relativity is useful, mathematically fairly straightforward, but limited. Special refers to the fact that the theory only works if everything is moving at a constant velocity, not accelerating. The general case is much harder, and it took 10 years until Einstein published his aptly named theory of General Relativity.
General Relativity boils down to the idea that instead of just space and time, you have a 4-dimensional spacetime, and that instead of being flat and isotropic, that spacetime can curve. The real mind-bending stuff kicks in when it reveals that this curvature is in fact equivalent to gravity, and that mass and energy create the curvature.
While most of the theory is a bit hard to penetrate, there is an apt metaphor for how a curved space can pull things in different directions like gravity. Imagine you’re flying from Los Angeles to Madrid, like in the graphic below:
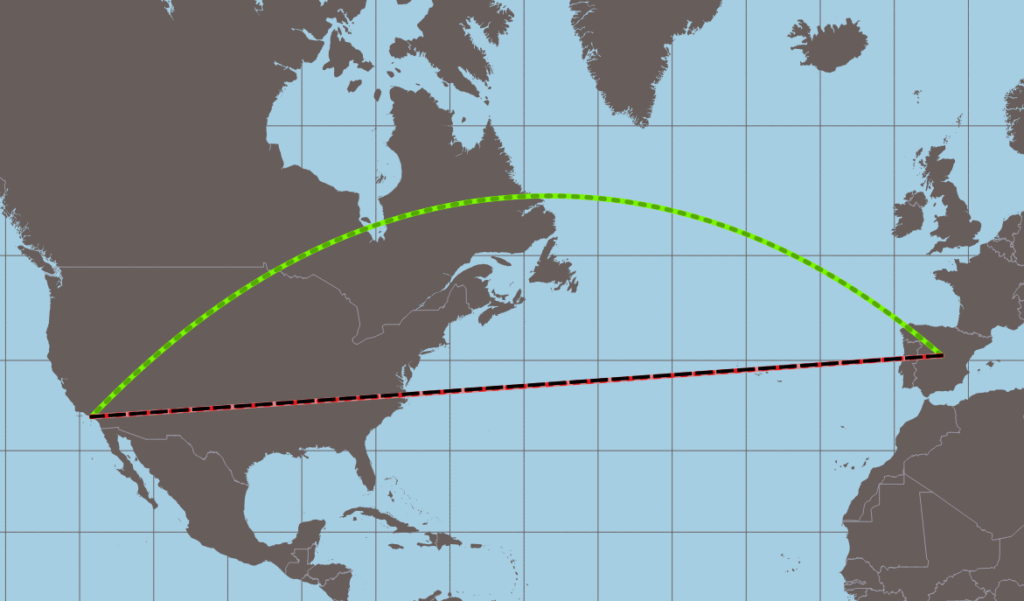
If you assume the Earth is flat, you would think that the red line would be the flight path, since it’s the shortest on your map, but when you get on the plane you end up taking the green path. This is simply because the space is curved. On a sphere, the green line is shortest path from A to B, but for the observer looking at it as if it were flat space, it’s as if your plane was being pulled up towards Greenland by a mysterious force. Similarly, an object taking the shortest path through curved spacetime appears to be pulled through flat space, manifesting what we think of as gravity.
Lines like the green arc above are called geodesics, and they describe the shortest path between two points in a curved space. A key takeaway of general relativity is that freely moving objects follow geodesics in spacetime. This is the big idea that makes our ray tracing algorithm possible, so keep it in mind.
What is a Black Hole?
The short version is, it’s an object that’s so dense that the pull of gravity is strong enough to prevent light from escaping.
The slightly less short version begs the question, how do we describe the curvature of spacetime? The broad answer is using a mathematical object called a metric. A space’s metric describes how the three dimensions of space and the one dimension of time get shorter and longer, trading off with each other. These metrics satisfy a system of equations known as the Einstein Field Equations, and after Einstein published his paper on General Relativity, physicists and mathematicians clambered to find solutions to these equations.
One such solution is known as the Schwarzchild metric, which describes the shape of spacetime surrounding a spherically symmetric mass. I’ve presented it here, courtesy of Wikipedia:

In case you’re unfamiliar, this builds off of the standard spherical coordinates, r, θ, and φ, as seen here, again courtesy of Wikipedia:
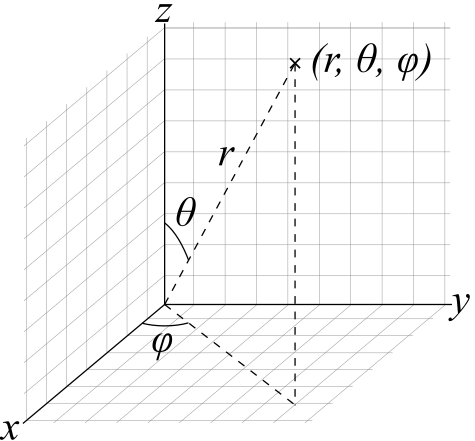
If the symbols aren’t familiar to you, don’t worry too much, the most important part is the factor of
A = (1 – rs/r) which appears in front of dt2, which denotes the distance in time, and dr2, which denotes the distance towards or away from the center of the sphere.
Let’s see what this factor does when you change r, the distance to the center. When r goes to infinity, the factor A goes to 1, so space and time are normal and flat when you are far, far away from the object. That makes sense. Now let’s make r smaller. As it gets smaller, rs/r becomes larger, so A gets smaller. A multiplies into dt, so differences in time become “smaller”, but A divides dr, so space starts to get larger and larger. By staying on the geodesic, you start moving more through space, and you slow down moving through time.
If you reduce r all the way down to rs, then A becomes zero. Time no longer contributes any “length” to the metric, and differences in space become infinitely large. I won’t belabor what this means in a physical sense, but needless to say, this is weird! The radius at which this weirdness occurs is called the Schwarzchild radius, and it’s equal to 2*G*M / c2, where M is the central mass, G is Newton’s constant, and c is the speed of light. This happens to coincide with the radius at which a mass would have an escape velocity equal to the speed of light, just using basic principles from Physics 101. Neat!
What this means is that if you have an object with all its mass below the Schwarzchild radius, you have an object that light can go into but not out of. Hence, a black hole. That phenomenon specifically manifests as a black sphere, but the interesting stuff happens around that radius, due to the way that light bends around a massive object, as we’ll see soon.
What is Ray Tracing?
Ray tracing is a method of rendering images to a screen by treating light like a ray that bounces from light sources into your eye. This is an approximation, but a really good one! The algorithm is conceptually simple and extremely powerful, at the cost of being a bit computationally expensive. Ray tracing is used in all sorts of physically based 3D rendering software, and is even being incorporated into some high performance video games lately for real-time visual effects.
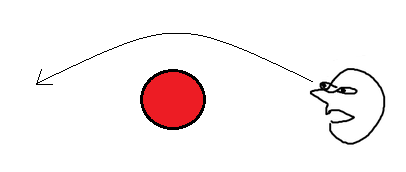
Let’s take a look at how light goes from the sun into your eyes. Imagine you’re hanging out in a big empty space, with only the sun and a cool red sphere:
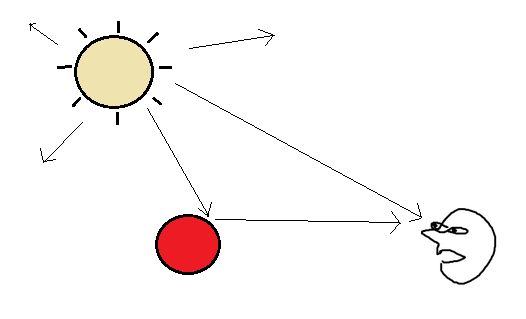
The basic idea of what happens is, the sun sends out rays of light, some of them go straight to your eye, some of them bounce off objects and then to your eye, and most of them just shoot off into nothingness. We don’t care about any light that doesn’t reach our eyes, so let’s adjust our frame of reference to what is technically called backwards ray tracing:
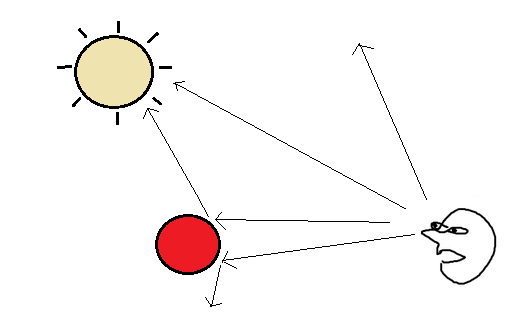
Now, we’re looking in each direction that the eye can see (which will correspond to each pixel of the screen), and cast a ray forward, seeing what it hits. This ends up being very conceptually simple, and simple scenes can be easily implemented, using intersection tests between rays and geometric objects, which have been around since Euclid. This technique is also fairly powerful, since many interesting visual phenomena, such as reflection, refraction, and various lighting models, can be implemented in this way.
Linear ray tracing projects are fun and somewhat beginner-friendly and look cool, so if you’re interested, I would highly recommend the beloved series of articles by Three Eyed Games on ray tracing in the Unity game engine. They make for a great tutorial and finish off with a perfect leaping off point for future expansions.
For our purposes, however, things need to get a bit more complicated. Basic ray tracing using only straight lines (sometimes called ray casting) doesn’t help us as we move into a curved space. The situations we’re trying to render are a bit more like this:
Luckily, Calculus 101 comes to our rescue. If a function is fairly well behaved, you can approximate it as a straight line for very short distances. Depending on how short those distances are, you can get an arbitrarily good approximation, and it sorta looks like this:
In the context of ray tracing, this is sometimes called ray marching. Since the geodesic curves that we are armed with are a system of differential equations, we can use numerical integration methods to perform this step.
Part 2 – Building the Renderer
For my first crack at this project, I immediately succumbed to the most poisonous instinct an engineer can have, and thought “I should do this the hard way”. So I painstakingly rewrote the OpenGL handler I made for my last project in C++, slapped all of the equations into a fragment shader without any good way to debug, and hit build to get this beautiful work of art:
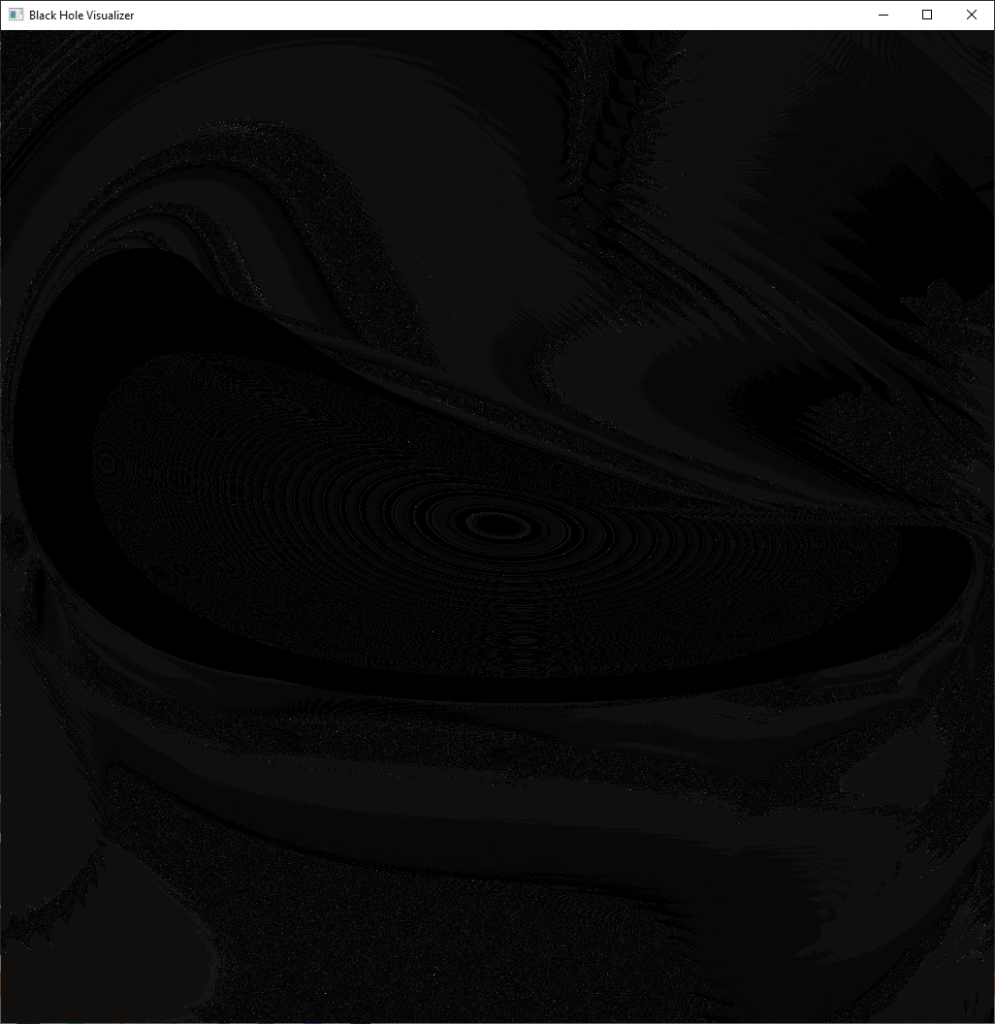
Then I spent a few days banging my head against the wall not being able to troubleshoot the weird patterns I was seeing, before finally admitting “defeat” and doing things the smart way, using the Unity game engine, which I feel 100x more comfortable with and have much more ability to visually debug. “The right tools for the job”, some would say.
Seeing the Black Hole
So, back on familiar turf, I started small by writing a simple linear ray tracer which would output the three basic parts of the black hole: A black sphere, a bright disk around it, and a starry background. This came together simply enough:
Now for the hard part! First, to implement ray marching. For this I split the shader into two parts, one which uses the camera’s projection matrices to create a ray for each pixel, and one which marches the ray by one step. I created four textures, corresponding to the position of the ray, the direction of the ray, the output color to render, and an integer value indicating if the ray was “done” marching.
This section is probably where most of the difficulty occurred, but none of it is that interesting to show because it was before I achieved the first visual result. Basically I had to deal with a lot of subtleties of converting from Cartesian to spherical coordinates, and then more subtleties when transitioning those to Schwarzchild coordinates.
The algorithm was inspired mostly by two papers. This paper by Riazuelo, which got me started, and this paper by Bacchini et al., which got me to the finish line. The Riazuelo paper was my initial inspiration for the project, and gave a lot of pointers on things like setting time steps, but ultimately their equations led to numerical issues, and their method of generating camera vectors kept giving me problems. The Bacchini paper introduced me to something called the ADM formalism, which meshed easily with my numerical integration function, and fixed my numerical issues.
After a good amount of tinkering and head scratching, I ended up with my first successful render of a black hole, with no disk, and a starry background:
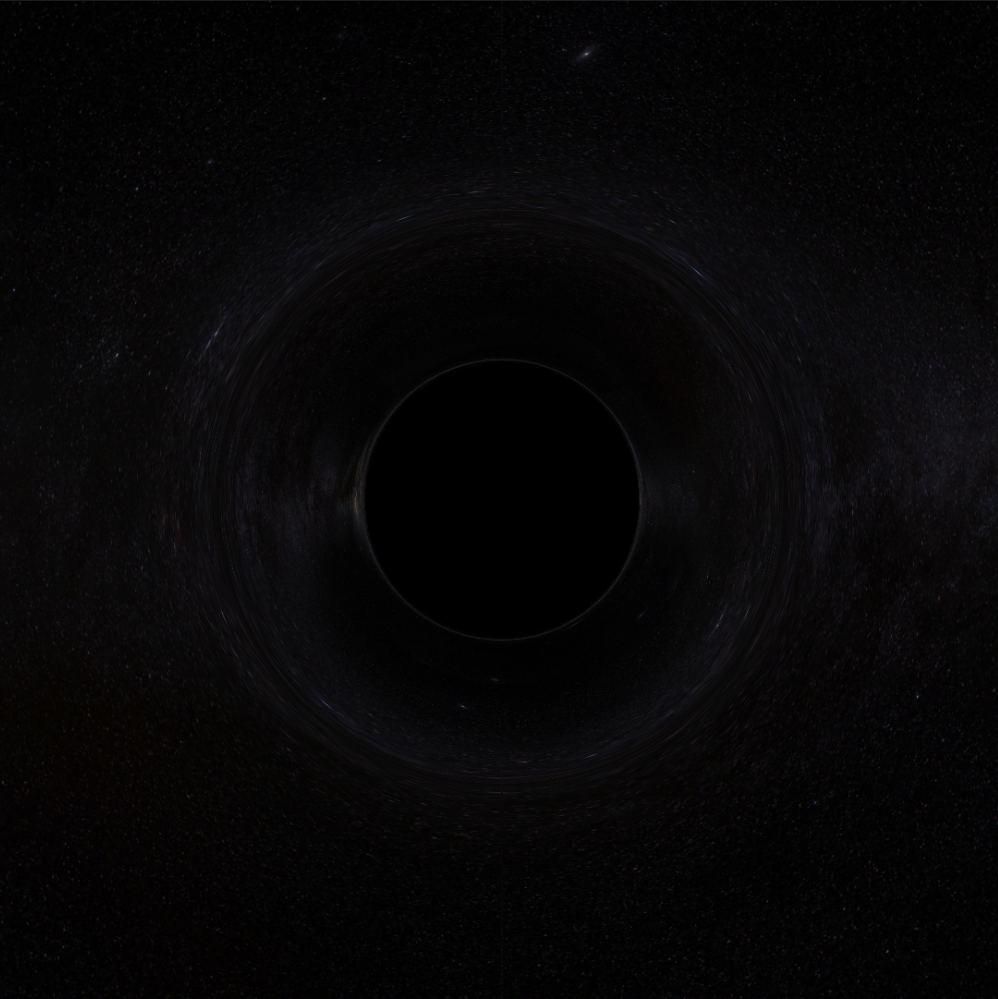
I was over the moon to see this, you can clearly make out some of the classic visual features, such as the photon sphere (the innermost ring of light) and the Einstein ring (the “stretchiest” part where the image flips).
The Accretion Disk
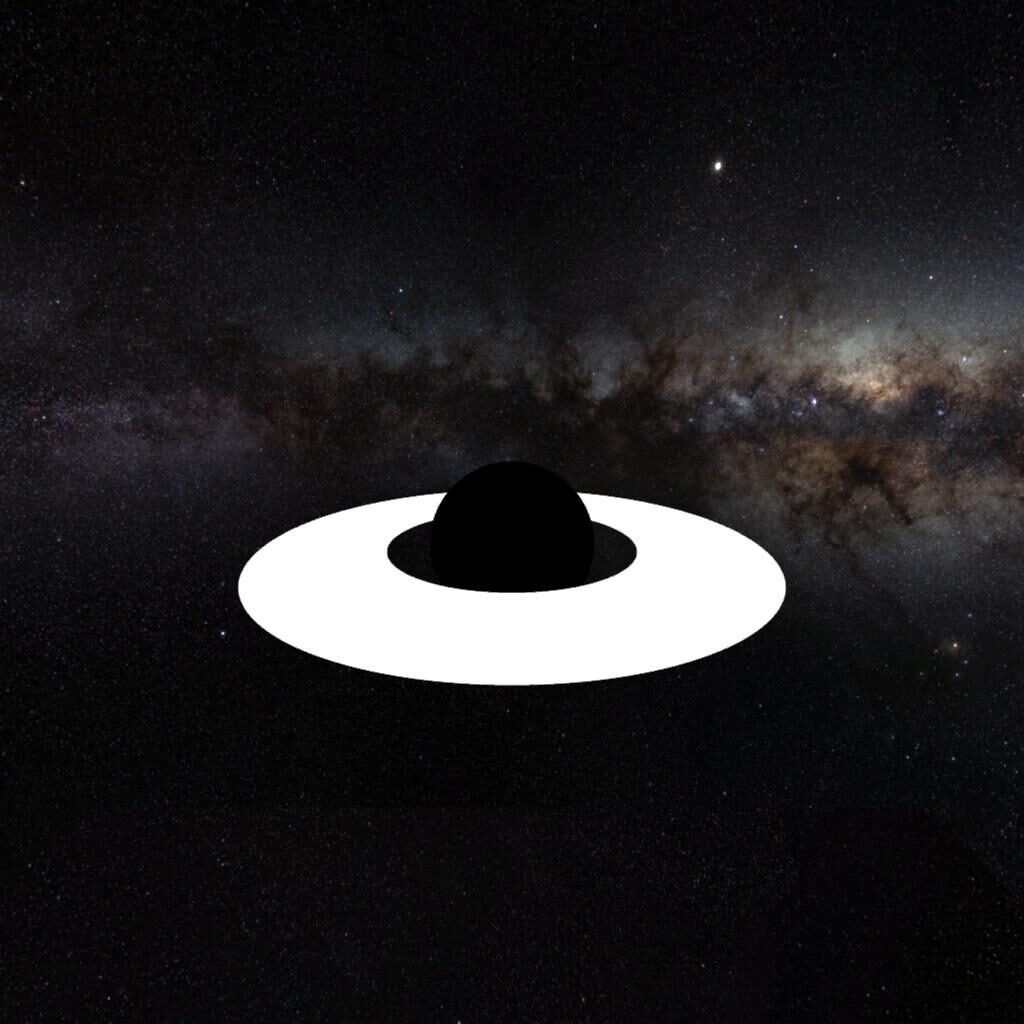
At this point, we have technically rendered a black hole! But it looks boring! My goal for the finished product is to look at least 10% as good as the black hole in Interstellar, so we need the actual visual component, the accretion disk, basically a bunch of hot gas which orbits the central mass. To start, let’s just slap on a white ring:
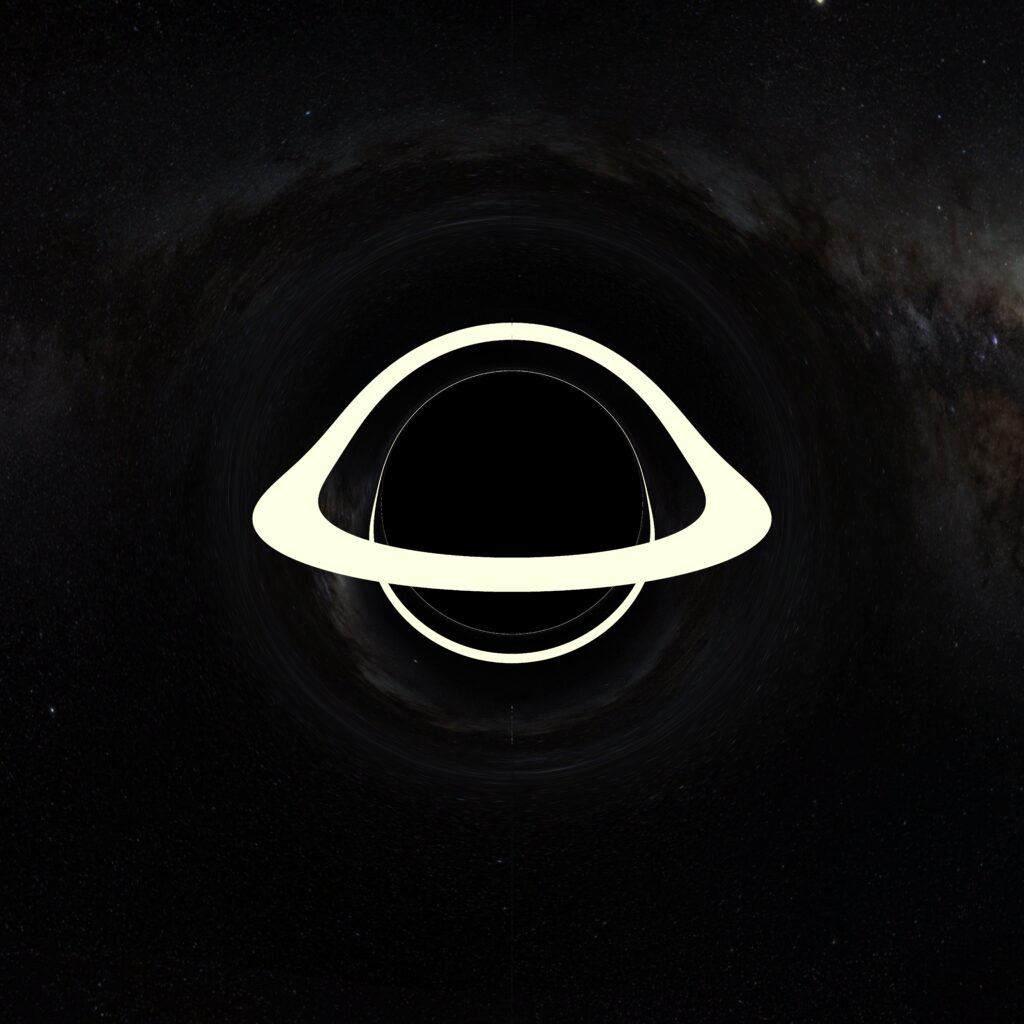
Alright! That’s better already! It’s worth noting that this is the same perspective as from the linear render before, but now you see the extra white above and below due to the light bending around the black hole and hitting the disk on the other side, which would normally be occluded.
The entire rest of the project is devoted to zhuzhing up the disk, and I’m just going to present it in the order that I accomplished things. First things first, enough of the boring white, let’s put a noise texture on it, I naively went with Perlin noise. Oh, and throw in some alpha blending too, for transparency.
Looks fake as hell! There’s a seam in the back, it’s all spirally and weird, and the brightness just falls off linearly. Slowly but surely, let’s add realism back in, starting with: Color.
What color is a disk of hot gas? Well, a lot of things that are hot enough to glow can be pretty well modeled as blackbody radiation, which follows a brightness-versus-frequency curve known as Planck’s law. If you’ve ever looked at a color gamut chart, or bought fancy lightbulbs, or worked as a blacksmith, you’ve probably seen the Kelvin scale that associates red with lower temperatures, and blue with higher temperatures.
For something like a star, you could directly look up the color based on the outer temperature. However, the accretion disk of a black hole complicates things, due to the phenomenon of redshifting and blueshifting, or the increase/decrease of wavelength when light gains or loses energy.
There are two sources of shifting in a black hole, “gravitational redshift”, which makes light redder due to the energy required to escape a strong gravity well, and the Doppler effect, which makes light from an object which is moving towards you bluer, and one moving away from you redder. In addition, objects moving towards you will also emit a brighter light, due to the phenomenon of “relativistic beaming”.
So that’s a lot of stuff that goes into the color of the disk at any given spot. The full process entails:
- Sample the brightness of the disk
- Calculate the frequency shift
- Use the shifted Planck curve to determine the brightness-vs-frequency curve
- Convert the curve into an RGB value
- Brighten/darken the value due to beaming
We’ve already implemented 1, we can get 2, 3, and 5, from physical principals, but 4 was all new to me. How do wavelengths of light correspond to RGB values? After reading this great guide to color theory by Chandler Abraham and starting to understand the CIE color space, I realized that this would involve a lot of integration for a given temperature and shift. To outsource this computation, I opened up my copy of MATLAB, happily saw that I still had 10 days on my old employer’s license, and used a script to generate a texture:
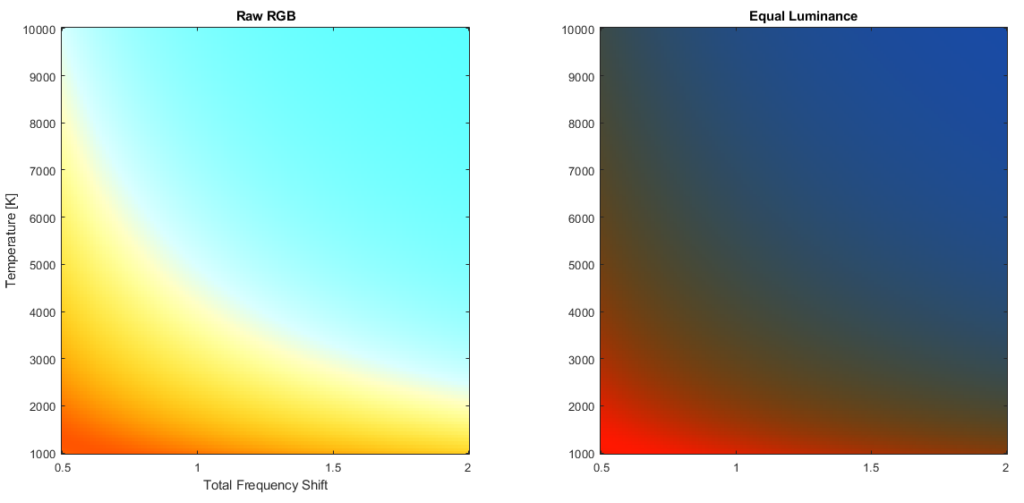
With this texture, we can simply sample the color at the calculated shift and temperature value, to get the color of the disk. That’s all well and good, but that merely begs the question, what temperature is the disk? At this point I turned to some really insightful lecture notes on astrophysics, from Professor Cole Miller at the University of Maryland at College Park. Here he derives from fluid mechanics the temperature of an accretion disk as a function of both distance from the center and mass of the black hole.
From these results it turns out that most black holes are blue. I was surprised by this, since my whole understanding was from the black hole in the movie Interstellar, which was colored more like a campfire than anything else. However, as the mass of a black hole goes up, the innermost stable orbit goes up, the energy at the orbit goes down, and the temperature goes down.
So there is a way to get red/yellow black holes, they just have to be really, really, really, really, really big. And I’m okay with that hand wave! The team that simulated Interstellar was, since as you can see from their renderings halfway down this page, their accretion disk is mostly blue, but turns a ruddy orange at the most redshifted spots. So I set a “max temperature” sliding parameter between 1,000K and 10,000K, and just set it to whatever looked best. Without further ado, here’s where that gets us:
Neat! But I’m sick of that placeholder texture. It’s time to figure out how to make good noise, learning from the internet’s guru of shaders, Inigo Quilez, and taking some code inspiration from Patricio Gonzalez Vivo & Jen Lowe’s The Book of Shaders. With a newfound understanding of when and how to use different types of noise, I switched over to fractional Brownian motion, and added a bit of radius-dependent skew to make it look like it’s rotating:
Muuuuuch better, but still not quite there, it looks a bit fake to me still, those circular edges. Back to the whiteboard. These are basically swirling clouds, right? How are clouds rendered? This took me down the rabbit hole of volumetric rendering using ray marching. Eventually I landed on this wonderful little guide on volumetric clouds from Chris’ Graphics Blog.
After a bit of figuring out, I was able to convert Chris’ code from one that renders clouds based on how they reflect light, to one that renders glowing gas based on both attenuation and emission. Oh, and I introduced an effect I simply forgot about, where the brightness scales with the fourth power of temperature, according to the Stefan-Boltzmann law.
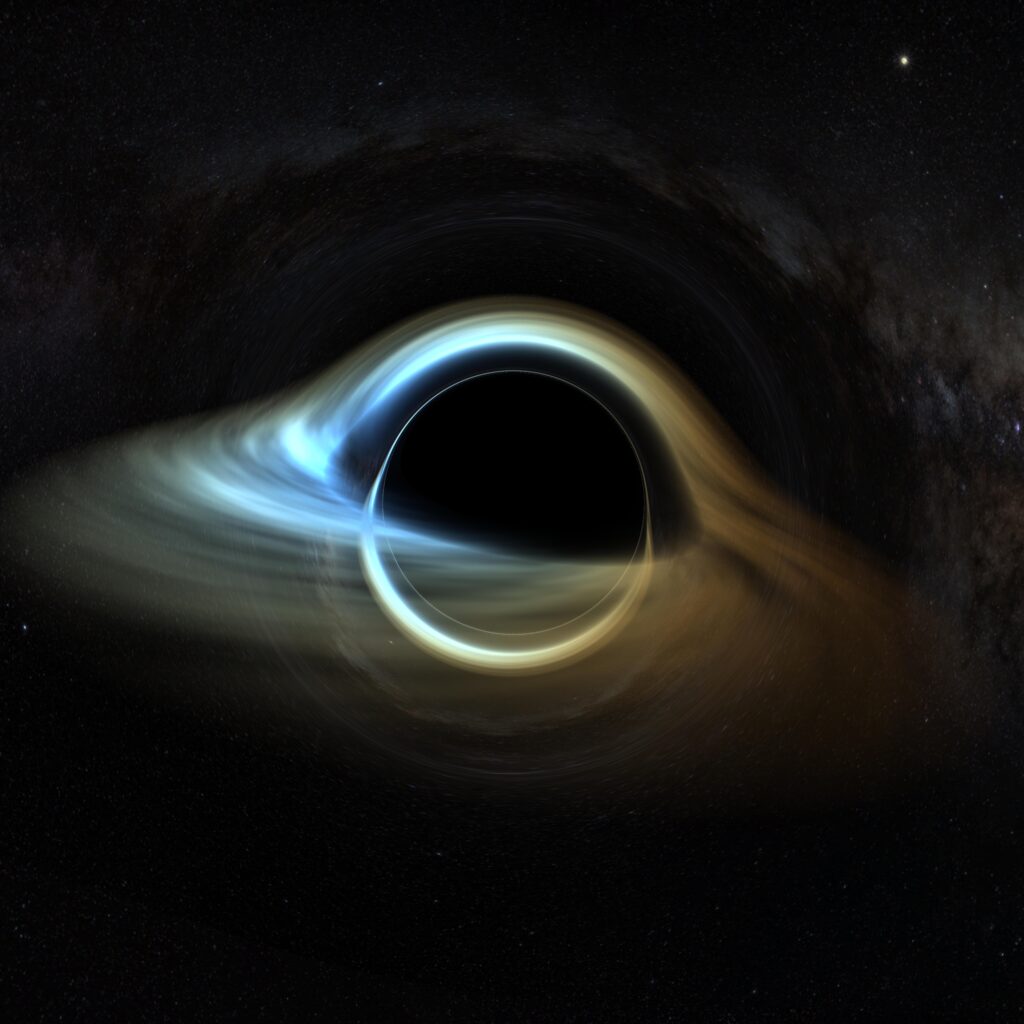
Now THIS I am happy with, I am truly thrilled. That said, there’s oooone more effect I want to get in there before I call it done. So far I’ve neglected to account for the fact that light takes a while to reach our eyes, especially when time is bent and we’re looking across enormous distances like this. SO, instead of seeing the disk’s rotation at a given moment, we should see it’s rotation at the time the ray hits. With that we get this neat bending of the shape of the disk along one side:
Is that everything?
Despite how happy I am with this, there’s still a few things I want to implement. Eventually. For now I’m tired and need to refocus on other projects. But down the line are future revisions:
Change black hole to Kerr metric
– The Schwarzchild metric is powerful, but it only really describes a body that isn’t rotating, and that rarely if ever happens in nature, it’s really hard to maintain exactly zero angular momentum. When black holes rotate, you end up getting really interesting new physics, things like spacetime itself being dragged in a circle.
– The problem with the Kerr metric is that it’s algebraically really messy. While I would’ve like to drop it in during this first revision, I need to take some derivatives of the metric and they’re just too complicated for me to do by hand and not mess up. I’m hoping to learn some sort of computer algebra system to do it for me.
Fluid/Particle simulation for accretion disk
– Ultimately I’m still setting the rotation of the accretion disk by hand, and anything set by hand isn’t fully physical. There’s a deep theory to how the little viscous bits of the disk clump together and break apart, but it’s all new material for me and I need to really absorb it before I try and implement it.
– I’ve written fluid simulation and particle simulation before, and they’re fun to do, so I hope to find an effective way to use them to make a really realistic looking accretion disk. If I can incorporate something like “density wave theory”, maybe I can get them to naturally generate things like spiral arms. Would be cool.
Part 3 – So What Exactly Am I Looking At?
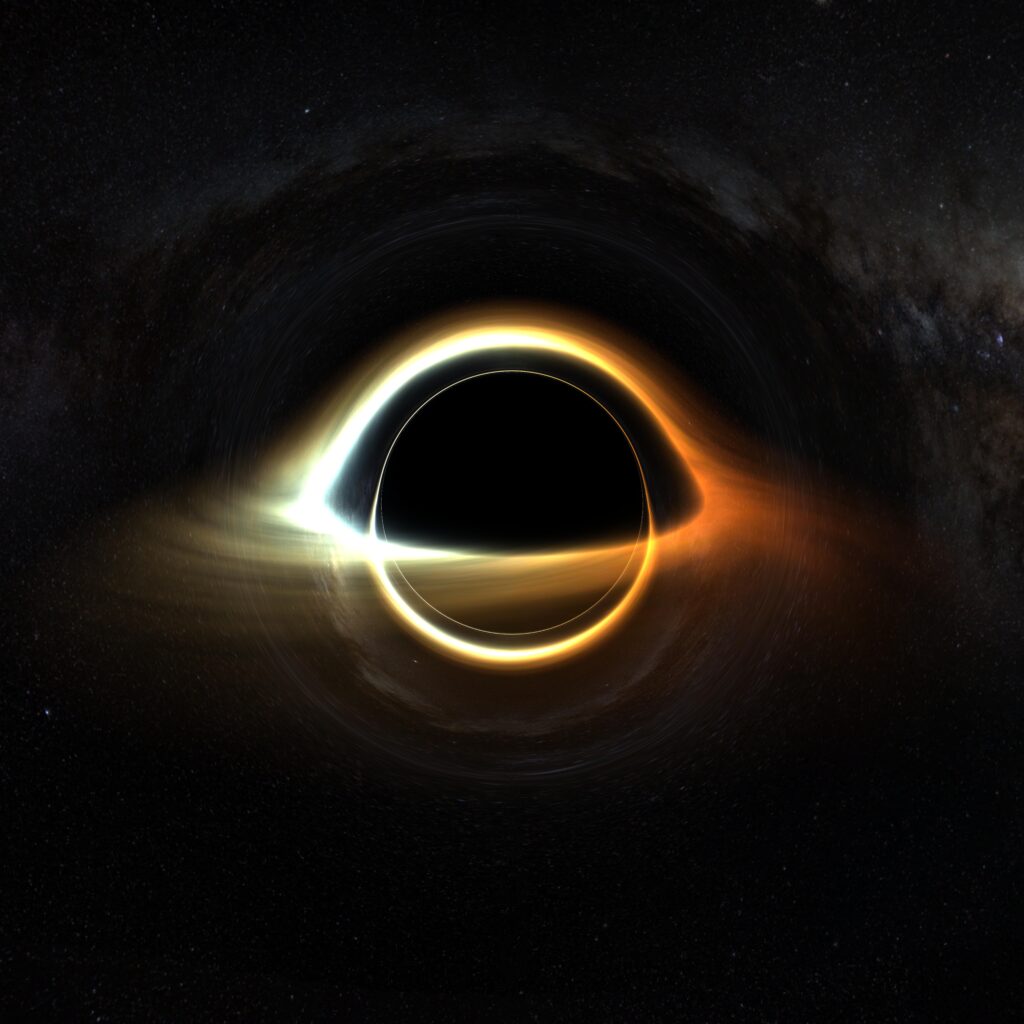
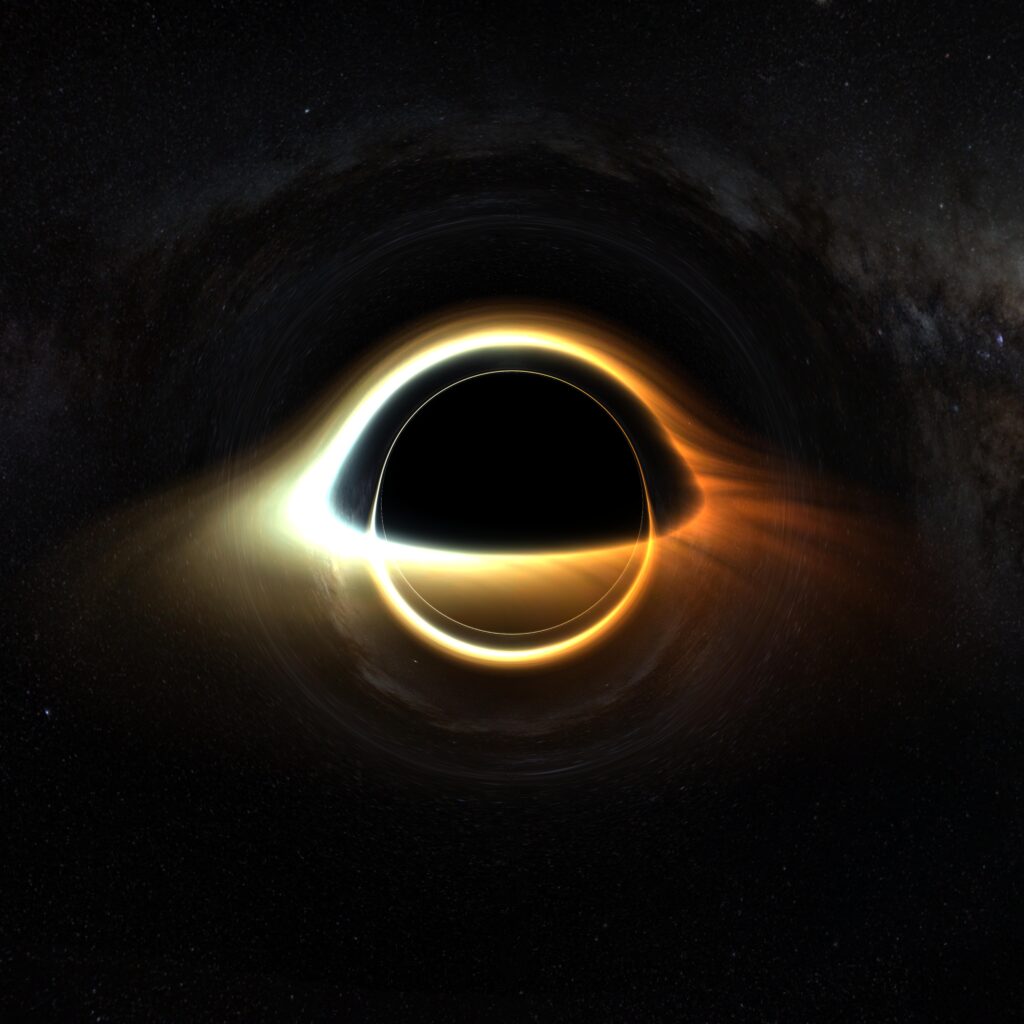
Finally, let’s take a look at some of the interesting phenomena you can see in one of these images.
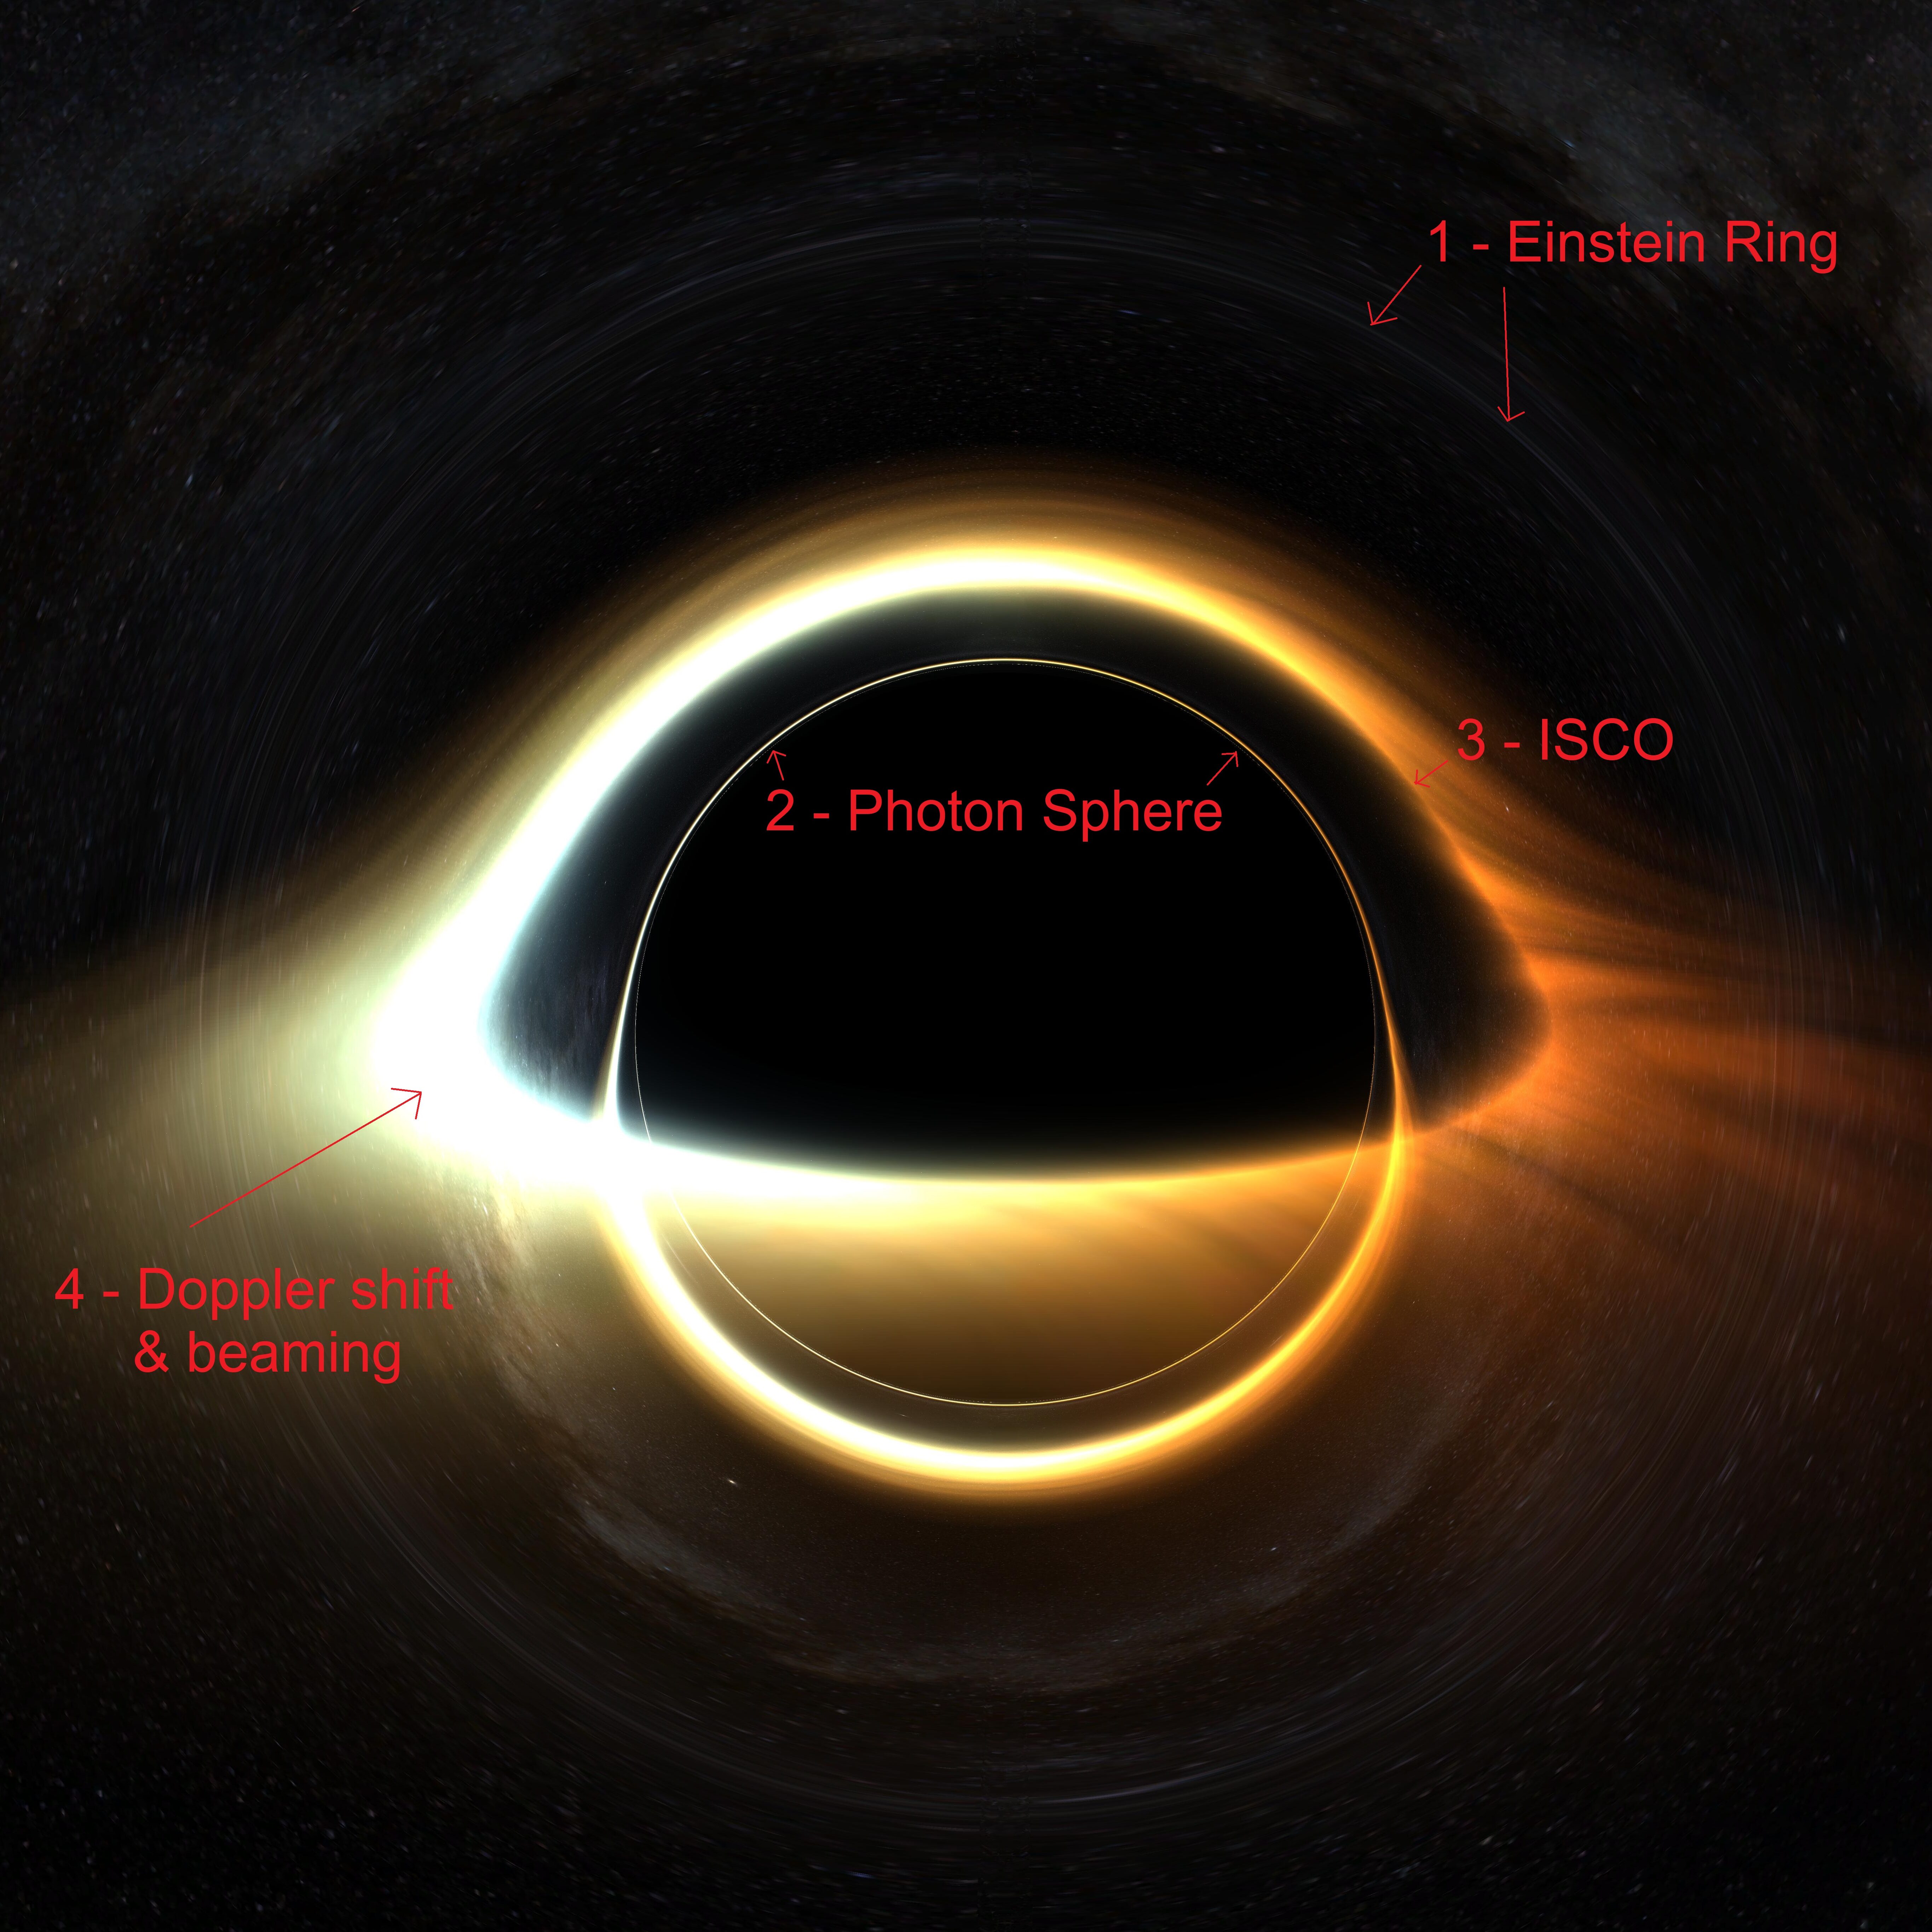
1 – Einstein Ring
Around the black hole you can see a blurry ring in the background image. This is the point where the gravitational “lens” comes into focus, known as the “Einstein ring”. If you look further in you will see the same image as outside, but flipped and skewed.
A neat side effect of this is that if you put an object directly in this focal point behind the black hole, it will appear as a ring around the black hole. Wikipedia has some neat pictures of this occurring in nature.
2 – Photon Sphere
The innermost thin ring of light corresponds to the most narrow unstable orbit of a beam of light, the “photon sphere”. I was very excited when this showed up in the render, since it’s entirely an outcome of the metric. There has never been a high-resolution enough image of a black hole to see this phenomenon in real life, but to me it’s the most visually interesting part.
3 – Innermost Stable Circular Orbit
Also known as the ISCO. This is the closest radius at which any massive object can orbit without being sucked in to the black hole, and therefore it is where the disk begins. The ISCO is an entirely relativistic phenomenon, since for a non-relativistic object you can always orbit closer if you just move faster.
4 – Doppler Shift & Beaming
At the spot shown in the image, the matter in the accretion disk is heading towards the observer, really quickly. This causes the combined effects that it becomes both brighter and bluer.
The Doppler shift, which makes the light blue, is the same as the Doppler shift that makes a police siren sound higher pitched when it’s driving towards you, except with light waves instead of sound waves. The brightness is due to relativistic beaming, or the “headlight effect”, a result of relativity which makes glowing objects brighter when they’re heading towards you.
References
- Minute Physics – Intro to Special Relativity – https://www.youtube.com/watch?v=1rLWVZVWfdY
- Cayetano Benavent – Geographica: Geodesic Lines & GIS – http://www.blog-geographica.com/2015/06/11/geodesic-lines-gis/
- Wikipedia – Schwarzschild Metric – https://en.wikipedia.org/wiki/Schwarzschild_metric
- Wikipedia – Spherical Coordinate System – https://en.wikipedia.org/wiki/Spherical_coordinate_system
- Three Eyed Games – GPU Ray Tracing in Unity – http://three-eyed-games.com/2018/05/03/gpu-ray-tracing-in-unity-part-1/
- Riazuelo, Alain – Seeing Relativity – https://arxiv.org/pdf/1511.06025.pdf
- Bacchini, F. et al. – Generalized, Energy-conserving Numerical Simulations of Particles in General Relativity – https://iopscience.iop.org/article/10.3847/1538-4365/aac9ca/pdf
- Chandler Abraham – A Beginner-s Guide to (CIE) Colorimetry – https://medium.com/hipster-color-science/a-beginners-guide-to-colorimetry-401f1830b65a
- Cole Miller – ASTR 498, Lectures on High Energy Astrophysics – https://www.astro.umd.edu/~miller/teaching/astr498/
- Cern Courier – Building Gargantua – https://cerncourier.com/a/building-gargantua/
- Inigo Quilez – fBM – https://www.iquilezles.org/www/articles/fbm/fbm.htm
- Vivo & Lowe – The Book of Shaders: Fractal Brownian Motion – https://thebookofshaders.com/13/
- Chris’ Graphics Blog – Volumetric Rendering Part 1 & 2 – https://wallisc.github.io/rendering/2020/05/02/Volumetric-Rendering-Part-1.html
- Wikipedia – Einstein Ring – https://en.wikipedia.org/wiki/Einstein_ring
There’s no comments here!? Just wanted to say your article was a great read and the end result is incredible. Thank you for breaking everything down as you did
All your pics suggest a rotating black hole. Is this the case?
Also if we can ‘see’ the light around a black hole, doesnt the relativistic doppler effect caused by the intense gravity mean that the the photons were ‘originally’ much higher frequency? so the accretion disc emits photons of very high energy. What Is the ‘spectrum’ of the accretion disc?
The metric is the Schwarzschild metric, so what you see here is a nonrotating black hole with a rotating disk around it. Rotating black hole shadows have a dent on the side rotating towards the observer, see here: http://org.yukterez.net/relativistic.raytracer/falling.into.a.kerr.newman.black.hole.html
Cool, truly interesting and exciting work
Genuinely excellent work mate, thank you for taking the time to write this up in so much detail, and for sharing it with us
Fantastic article! I am super impressed. Could you maybe post some high resolution versions of the final item? 🙂
Very, very cool. A huge amount of research and learning to do a “good job.” You can be proud of this!
Would you mind adding some numerical info? Just how massive are the black holes in your images? You say, “… we’re looking across enormous distances like this.” Just how far away is the observer? And most intriguing, in the first animation sequence, when the observer crosses the accretion disk, it seems infinitesimally thin. Is that a short-coming of the modeling? Or is it due to the scale at these “enormous distances”? Or does accretion physics say it’ll be really thin?
In your code you say
“// NOTE: By all means the following value should be squared.
// For the life of me, I can not yet figure out why
directionSph.z *= originSph.x * sin(originSph.y);”
This is because your derivative in “ToSphericalVector” for dphi/dx and dphi/dz should be
-origin.z / (rxz*rxz) and origin.x / (rxz*rxz) respectively instead of -origin.z / rxz and origin.x / rxz
Hope that helps.
hello i would like to have the high resolution picture of a rendered background distorted black hole image from the section (After a good amount of tinkering and head scratching, I ended up with my first successful render of a black hole, with no disk, and a starry background:) here. i think it looked really dope and hoping if i could use it as a print on my graphic tee. i know its 2024 now but hope u d reply i think it look really cool and awsome. Love ur work!